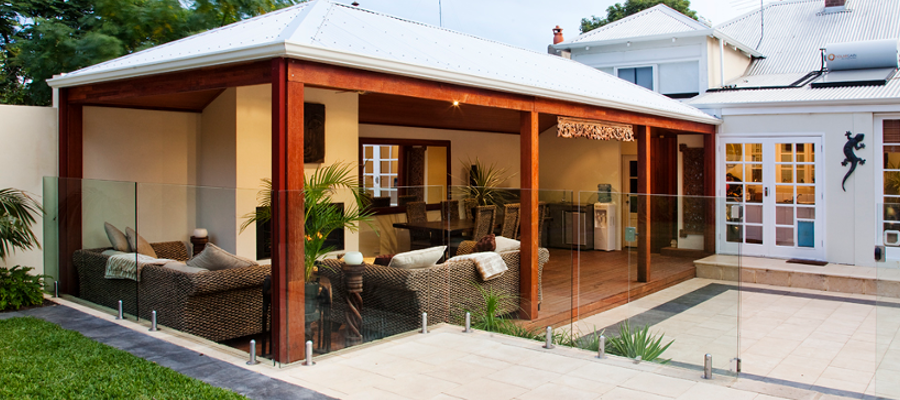
Now that the frame of your Pergola is complete, it’s time to put on the roofing to protect you from the elements.
Step Ten – Installing gutters
It is most likely that you will be using either a Colorbond roof or a polycarbonate roof for your structure. This guide should be sufficient for both forms of roofing (with a few minor differences between the two) however if you are installing twin wall polycarbonate you will need to seek out different instructions.
Before we move onto the actual roof sheeting, we must first address the installation of the gutters. Once the gutters are in, we can move onto the roofing, and finally the capping of the structure. When installing all metalgoods make a point to remove all of the protective plastic coating that you see before installation.
The instructions at this point may vary depending on what kind of gutter you are installing for your pergola. You may be using an internal gutter with a downpipe, or you might be running a gutter around the front of your structure to the far side and removing excess water there. Whatever it is that you need be sure to check your plans very carefully at this stage and make sure that you are clear, as well as reading through this whole set of instructions once before doing anything, so that you can determine exactly which part of these instructions you need to follow.
Cut, and install stop ends
Stop ends are essential for every gutter as they stop water from flowing out of the end of the gutter. To prepare your gutter you will need to fix the stop ends (check how many you need) and pop (for your downpipe) First, Trim the gutter to length required with tin snips if necessary. Hold your stop ends in place and drill a hole through the back front and bottom flap of the stop end, as well as the corresponding spot on the gutter so that you have three clear holes for rivets to be fixed. Once you have drilled the stop end and gutter, attach the stop end with a rivet gun, and silicone the stop end from the inside so that the end is watertight. Repeat this process for each stop end required.

Install pop(s)
To install your pop you first need to work out which post will be supporting the downpipe. This will determine where the pop needs to be positioned within your gutter. On the inside of your gutter and in the correct spot, trace a line around the inner circle of the pop and use a chisel to punch holes around this line in order to punch a section of the gutter out. The pop should now slide neatly into the hole. Drill, rivet, and then silicon the pop onto the gutter.


Install gutter clips
Once your gutter is prepared it’s time to install it. To hold up the gutter you will need gutter clips. Nail your gutter clips to the top of the beam with 30mm flat head connector nails. Gutter clips should be placed at a maximum of 900mm centres. To create a fall on your gutter, Use a string line, temporarily nailing a nail at both ends of the beam where the gutter will be. Use a level to make sure there is a fall towards the end where the downpipe will be and connect your clips so that they create this fall. The fall should be 1:500 or 1cm for every 5 metres.

Install gutter
Once the clips are in place, installing the gutter is very easy. Simply slip the gutter on to the gutter clips and click it firmly into place. Drive a nail every 900mm through the top back edge of the gutter into the beam using a 30mm flat head connector nail. Make sure that you pull the gutter down to the nail/string line level to ensure that the fall is correct.

Mitre Gutter if needed
If you have an internal gutter on you structure as detailed below, you will more than likely need to have your standard gutter travel along the bottom chord to collect water from the internal gutter and take it away from your home’s guttering so as not to overload it. To mitre your gutter follow these simple steps.
With the gutter upside down mark where the corner will occur (point A) on the back of the gutter. Using a square, draw a line on the outside of the back of the gutter from point A to point A1 as shown.

On the back of the gutter place a further two marks, each equal to the width of the gutter (at points B and C) to extend beyond the fascia corner. The central mark B should be extended completely around the outside of the gutter using a square and pencil.

On the base of gutter, draw a line to connect the continuous line from B1 to both A and C. Mark a line 10mm away from, but parallel to A-B1, and extend this across the back of the gutter. This will produce a “lap” when the mitre is formed. This parallel line should also extend up the back of the gutter to A1.

Using snips, cut along the line on one side an one the other side, cut on the parallel line which is 10mm in from the original line drawn connecting A-B1. You will cut out the complete V marked into the gutter. In addition, remove excess material at A and B1 to allow the outside of the gutter to fold easily, and the tags to overlap.

Cut a 45 degree notch into the bead of the gutter at the top directly in line with the point of the V.

Fold the gutter around until the back sections touch each other. Fold tag inside the back gutter, rivet and silicone.

Prepare and install internal gutter
The internal gutter is located on the house side of your structure. This gutter system is very different to the external gutter and is a great way to keep the rain water falling on your pergola separate from the water falling onto your home. This avoids the problem of potentially overloading your house gutter and causing internal leakages in your home.

Measuring your internal gutter
Your internal gutter will need to project 50mm past the end of the bottom chord so that the water can drop into the end gutter. The end gutter runs along the front of the bottom chord of 1 end of the structure.
Make an internal gutter stop end
If you’ve ordered it from Softwoods, your internal gutter will be approximately 200mm longer than you require. This is so you can cut and fold the gutter to make a stop end. The stop end can be made by cutting 100mm into the four points shown in the diagram below and then folding them inwards at 90 degrees. Once you have folded the ends, trim across the top of them to make a neat stop end. Drill and rivet the folded ends to hold them together and then apply silicone from the inside to make sure the gutter is water tight.

Install internal gutter
The internal gutter sits on the rafters in between the beam and the bottom purlin. It should slip into this space as you will have left a 120mm gap between the beam and the bottom purlin. When installing, be sure to remember that the internal gutter over hangs 50mm into the end gutter along the bottom chord. Secure the gutter with 30mm connector nails every 900mm and cover with silicone if needed.
Once your gutters are correctly installed, you can move on to the final step in the construction of your pergola, installing the roofing
How to build a Gable Roof Pergola – Step Eleven – Installing Roofing
How to build a Gable Roof Pergola
For further information or any inquiries you might have please get in contact with us via the phone or the form below, we’d love to hear from you.
Softwoods
Softwoods is an independent, family owned company that has been trading for over 30 years. In that time we’ve worked hard to build a business that we’d like to deal with if we were building in our own backyards. We’re community minded, environmentally conscious, and always focused on our customers experience.
ABN: 49 076 530 848
Our Locations
573 Port Road, West Croydon SA 5008
Phone (08) 8346 1499
Email [email protected]
493 Wright Rd, Modbury SA 5092
Corner Wright & McIntyre Roads
Phone (08) 8396 4044
Email [email protected]
28 O’Sullivan Beach Road
Lonsdale SA 5160
Phone (08) 8384 5133
Email [email protected]
Suite 15 Plaistowe Mews
102 Railway Street
West Perth WA 6005
Phone 1300 737 465
Copyright © 2024 Softwoods • Pergolas, Decking, Fencing, Carports, Roofing • Site by Adelaide Websites
© 2025 Softwoods - Pergola, Decking, Fencing & Carports, Roofing.